We had a limited amount of time during pre-production, after some discussion we agreed on a the genre and chose a horror. In brief our story was that there was a shooter in the school but nobody knew of their location, two girls were trying to find each other to hide from this murderer on the school premises.
| E.g. Storyboard |
Unfortunately due to only being allowed to film on the school premises we did not have much of a choice in location
therefore we could not go into much detail within our preliminary video, on the other hand that gave us more time to think about the areas that we were told to cooperate and focus on. The three main actions were: a door opening, one character approaching the other and a short conversation between the two; we were allowed to present this in anyway that we desired, using a variety of shots and angles. In the production process while filming our videos we were also limited in time, therefore it was impossible to become completely familiar with the video camera (DLSR50) however we did get a chance to play around with different camera angles and shots, as well as this we decided to use the school's theatre as the basis of our location which allowed us to play with the lighting and to create an eerie atmosphere for our horror. The red lighting created a few shadows, also adding to the creepy atmosphere.
Due to limited time and little experience with the video camera and filming techniques we came across some negatives during the production process. The fact that it was very dark in some areas of the theatre the camera did not focus on the image very well which created quite blurry shots while other times the darkness of the theatre was a positive because it captured some fantastic shots, especially while I was walking through the door, in the future we will be well aware of the negatives which can come about with lighting and we will avoid getting caught up in this.
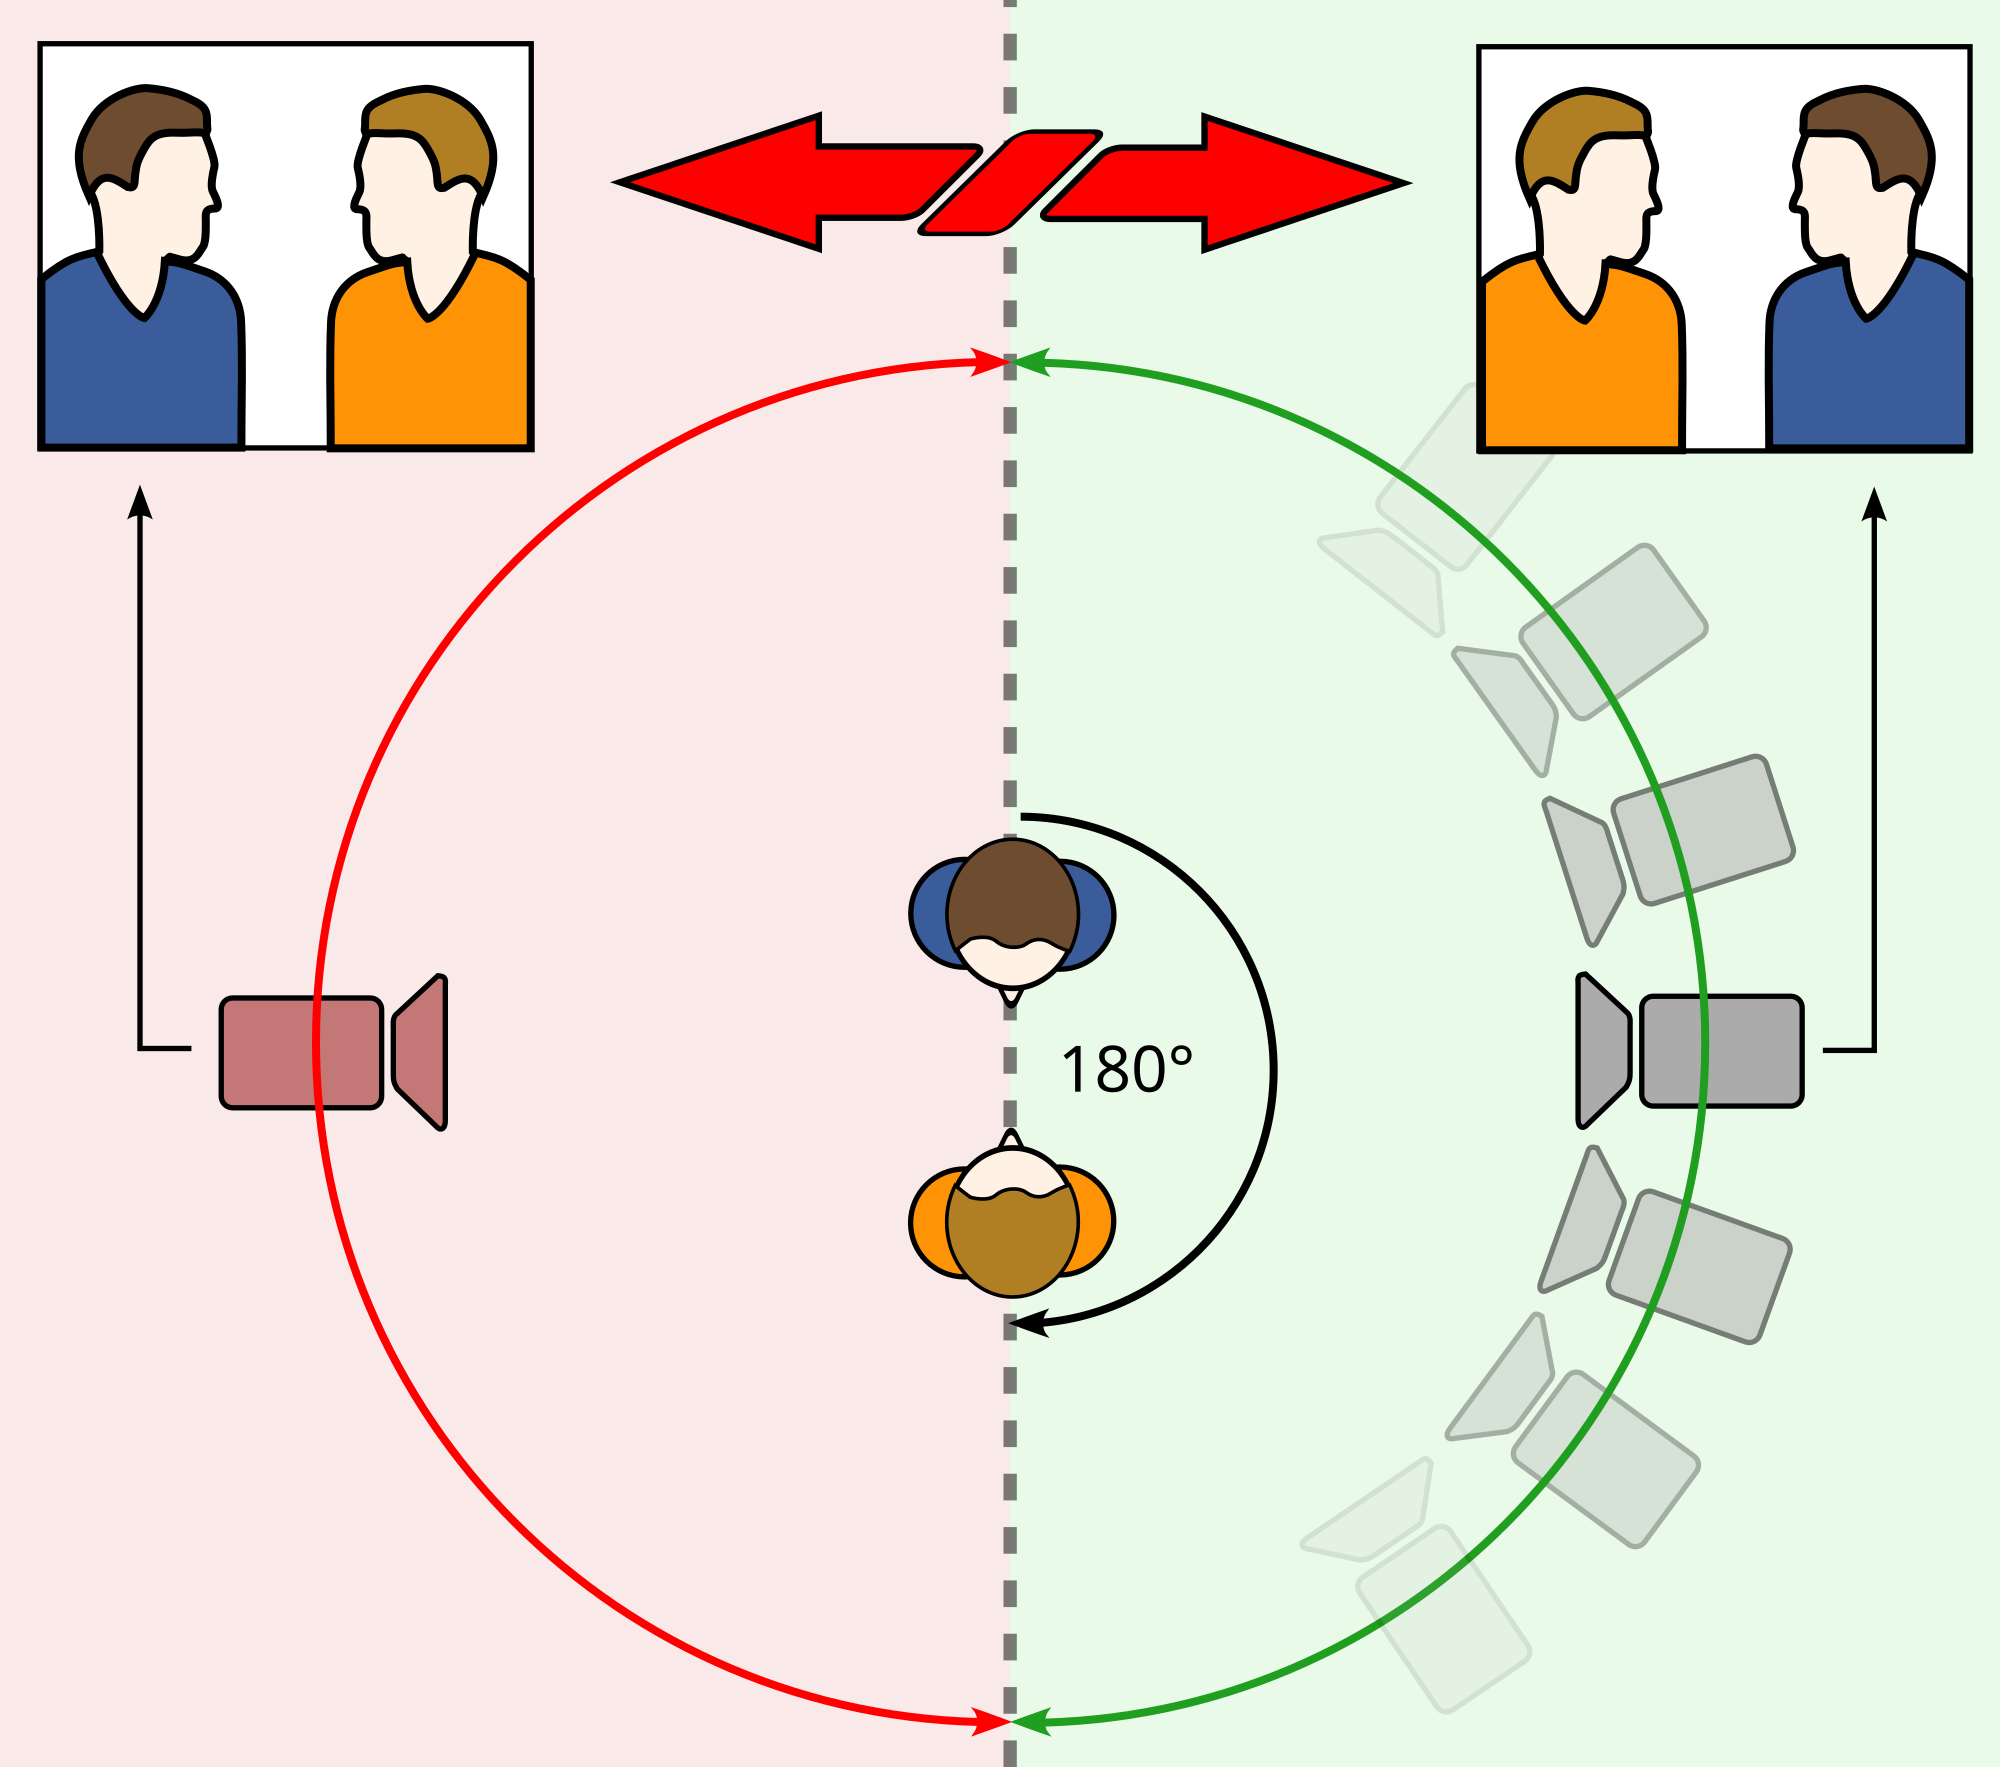
We were asked to focus on three key elements in filming: Shot reverse shot, Match on action and The 180 degree rule which enable us to immerse the audience in our clip through it's realism and fluidity.
Match on action : refers to film editing and video editing techniques where the editor cuts from one shot to another view that matches the first shot's action. An example of this in our work is where I put my hand on the door handle and go inside, to film this one action we had to film twice from both sides of the door and then splice the two together later in post-production, this created the illusion that I opened the door and walked through even though it had to be filmed twice.
 |
| Example of match on action in our work |
 |
Example of shot reverse shot in our work
|
 |
| Example of the 180 degree rule |
As well as being able to edit, cut and splice all the short clips together in the post-production process using an editing software, we were able to play about and discover sound effects and music. Through YouTube and converting to MP3 websites we were able to cooperate two different songs in our video, one of them being "Tiptoe through the tulips" and the other one was the theme tune from Jaws just to help us create a more scarier atmosphere and a more believable horror. Personally I think for our first preliminary task, bearing in mind the limited time and experience we had with filming and editing, our preliminary task was very successful because we successfully focused on all areas that we were asked to focus on and created something clear and understandable, using different types of camera shots and angles, an editing software and music.
No comments:
Post a Comment